


18 Sep 2025
A Step-by-Step Guide: How to Correctly Install Lead Flashing
While the prospect of working on a roof can be daunting, understanding how to install lead flashing is a skill that can be mastered by a dedicated and careful DIY enthusiast

Lead flashing is the unsung hero of a weatherproof roof. For centuries, this malleable and incredibly durable material has been the professional’s choice for sealing the joints between a roof and an abutting wall, chimney stack, or other architectural feature. A correctly installed lead flashing system protects the underlying structure from the devastating effects of water ingress, ensuring the integrity of your home for decades.
This comprehensive guide will provide you with the in-depth knowledge and step-by-step instructions required to achieve a professional, effective, and long-lasting finish.
For any roofing project, the quality of your materials is paramount. We recommend a reliable product such as the Lead Code 4 300mm Roofing Lead Flashing Roll, which offers the perfect balance of durability and workability for most common flashing applications.
Understanding the Fundamentals: Tools, Safety, and Lead Codes
Before you even think about stepping onto a ladder, it’s crucial to be thoroughly prepared. This means having the right tools for the job, a robust safety plan, and a clear understanding of the materials you are working with.
Essential Tools and Materials
- Lead Flashing: The appropriate code for your project (Code 4 is a versatile choice).
- Safety Equipment: A stable ladder or scaffolding tower, safety harness, non-slip footwear, heavy-duty gloves, safety glasses, and a dust mask (P3 rated).
- Measuring & Marking: A tape measure, a straight edge, and a pencil or chalk line.
- Cutting Tools: An angle grinder with a diamond mortar-raking disc, or a hammer, plugging chisel, and bolster chisel for creating the chase. A sharp utility knife or aviation snips for cutting the lead.
- Dressing & Fixing Tools: A lead dressing tool (or dresser), a bossing mallet or stick, and a chase wedge for shaping the lead.
- Fixings: Hall clips, lead wedges (made from offcuts), or stainless steel screws and washers.
- Sealing: A quality mortar mix (3:1 sand to cement) or a modern, flexible lead sealant. Pointing trowel.
- Finishing: Patination oil and a soft, clean cloth.
Safety: Your Number One Priority
Working at height is inherently dangerous. Never compromise on safety.
- Stable Access: Ensure your ladder is in good condition and placed on firm, level ground. Ideally, use scaffolding for more extensive jobs.
- Weather Conditions: Do not work on a roof in wet, icy, or windy conditions.
- Lead Handling: Lead is a heavy metal. Always wear gloves when handling it and wash your hands thoroughly after work, especially before eating.
- Dust Control: Cutting mortar creates fine silica dust, which is harmful if inhaled. Wear a P3-rated dust mask and safety glasses.
Decoding Lead: Which Code Do You Need?
Lead sheet is categorised by ‘Code’, which denotes its thickness and weight. Using the correct code is vital for the longevity of the flashing.
- Code 3 (1.32mm): The thinnest and lightest. Generally used for soakers – small pieces of lead placed between slates or tiles at an abutment.
- Code 4 (1.80mm): The most common choice for cover flashings, step flashings, and general roof work. It offers a great balance of flexibility and durability.
- Code 5 (2.24mm): A thicker, more robust option used for larger roof areas, valleys, and gutters where greater water flow is expected.
- Heavier Codes (6, 7, 8): Reserved for specialist applications like flat roofing, cladding, and heritage work.
The Installation Process: A Detailed Walkthrough
Step 1: Meticulous Preparation and Measurement
Success lies in the preparation. Rushing this stage will lead to problems later on.
- Clear and Inspect: Begin by thoroughly cleaning the work area. Remove all dirt, moss, and loose debris from the roof tiles and the wall. Inspect the brickwork and mortar joints for any signs of damage that may need repairing before you begin.
- Create the Chase: The chase is the channel in the mortar joint that the top edge of the flashing tucks into. This is the most critical part of the waterproofing. Using your angle grinder or hammer and chisel, rake out a continuous mortar joint to a minimum depth of 25mm. The chase should be positioned at least 150mm above the roof tiles at its lowest point. Ensure it is straight and clean.
- Measure and Cut: Measure the length of the flashing run. Crucially, never cut a single piece of lead longer than 1.5 metres. This is the golden rule of leadwork. Longer pieces cannot accommodate thermal movement (expansion and contraction with temperature changes) and will inevitably split and fail over time. For runs longer than 1.5m, you will create multiple sections with a 100mm overlap. When calculating the width of your lead, you need to account for three parts:
- The section that goes into the chase (approx. 25mm).
- The section that goes up the wall (the upstand, minimum 75mm).
- The section that covers the roof tiles (the cover, minimum 150mm).
For a standard installation, a width of 250mm-300mm is typical. Cut the lead to your required dimensions using a sharp utility knife, guided by a straight edge.
Ready to make the first cut? Get your Lead Code 4 Flashing and get started with confidence.
Step 2: Expertly Shaping and Fitting the Lead
This is where the true craft of how to install lead flashing comes into play. Lead’s malleability is its greatest strength, allowing it to be shaped perfectly to any contour.
- Pre-forming the Flashing: It is much easier and safer to do the initial shaping on the ground. Mark a line where the lead will bend to go up the wall. Use a piece of timber as a straight edge and carefully bend the lead to a right angle along this line.
- Inserting into the Chase: Carefully take your formed piece of lead up to the roof. Insert the top 25mm edge fully into the prepared chase.
- Dressing the Lead: This is the process of moulding the lead to the roof profile. Start at the top of the flashing, where it meets the wall. Using your lead dresser and bossing mallet, gently tap the lead into place. Work systematically downwards and outwards, smoothing the lead over the contours of the roof tiles. The aim is a snug, tight fit with no gaps where wind or water can penetrate. Use steady, firm taps rather than hard blows, which could split the lead. For profiled tiles, this process requires more time and care to ensure the lead is worked into every dip and curve.
Step 3: Secure Fixing and Weatherproof Sealing
Once shaped, the flashing must be permanently secured and sealed.
- Fixing in the Chase: The lead needs to be held firmly within the chase. The traditional method is to create small, rolled-up lead wedges from offcuts and hammer them into the chase at 450mm intervals to jam the flashing in place. A more modern and often more secure method is to use proprietary Hall Clips, which are plastic clips that grip the lead and are then wedged into the joint.
- Pointing the Joint: The final seal is created by pointing the chase. You can use a traditional mortar mix or a modern, flexible lead sealant that comes in a cartridge. While mortar is traditional, a good quality sealant offers excellent adhesion and flexibility, accommodating thermal movement better than a rigid mortar joint. Whichever you choose, force the material deep into the chase, ensuring there are no air pockets. Finish the joint with a pointing trowel, leaving a neat, slightly angled surface that will shed water.
- Creating Weatherproof Overlaps: For runs over 1.5m, ensure your next piece of lead overlaps the previous one by a minimum of 100mm. The overlap must be arranged so that water flows down over the join, not into it.
Step 4: The Professional Finish
A small final step makes a huge difference to the appearance and longevity of your work.
- Apply Patination Oil: As soon as you have finished pointing, apply a generous coat of patination oil to all visible lead surfaces using a soft cloth. This oil is essential. It prevents the formation of lead carbonate, an unsightly white powder that forms when new lead is exposed to rain. This powder can run down your roof and brickwork, leaving stubborn white stains. The oil provides a protective barrier, allowing the lead to weather naturally to its beautiful, uniform grey patina.
Frequently Asked Questions (FAQ)
Can I install lead flashing myself, or do I need a professional?
This is a job an experienced DIYer can tackle, provided they are confident working at height and follow safety procedures rigorously. It requires patience and attention to detail. If you have any doubts about your ability to work safely on a roof or to achieve a fully watertight seal, we strongly advise hiring a professional roofer. An incorrectly installed flashing can lead to serious water damage.
What is the difference between step flashing and cover flashing?
Cover flashing is what we have described in this guide – a continuous piece of lead used where a roof meets a flat wall. Step flashing is used where a pitched roof abuts a wall that runs up the slope of the roof (like the side of a chimney). It consists of individual pieces of lead installed in steps, with one piece for each course of tiles, integrated with soakers to create a weatherproof seal.
Why is there a 1.5-metre maximum length for lead flashing?
This is a critical building standard (as outlined in BS 6915, the British Standard Code of Practice for the design and construction of fully supported lead sheet roof and wall coverings). Lead expands and contracts significantly with changes in temperature. A piece longer than 1.5m will be unable to accommodate this movement, causing stress that will eventually lead to cracks and splits, completely compromising the flashing. Using shorter lengths with proper overlaps allows each section to move independently.
My lead flashing has split. Can it be repaired?
Small splits can sometimes be repaired by a professional using lead welding techniques. However, in most cases, a split is a sign that the flashing was installed in too long a length or has reached the end of its life. The most reliable and long-term solution is to replace the entire section correctly.
Can I use a different material instead of lead?
There are lead-free flashing alternatives available, often made from modified bitumen or other polymers. While they can be effective, none have the proven longevity and durability of lead, which can last for over 100 years when installed correctly. For a truly long-lasting, reliable, and traditional finish, lead remains the superior material.
For a job that will stand the test of time, invest in the best materials. Purchase your Lead Code 4 Roofing Flashing Roll from our online store today.
Read more about our Lead Flashing
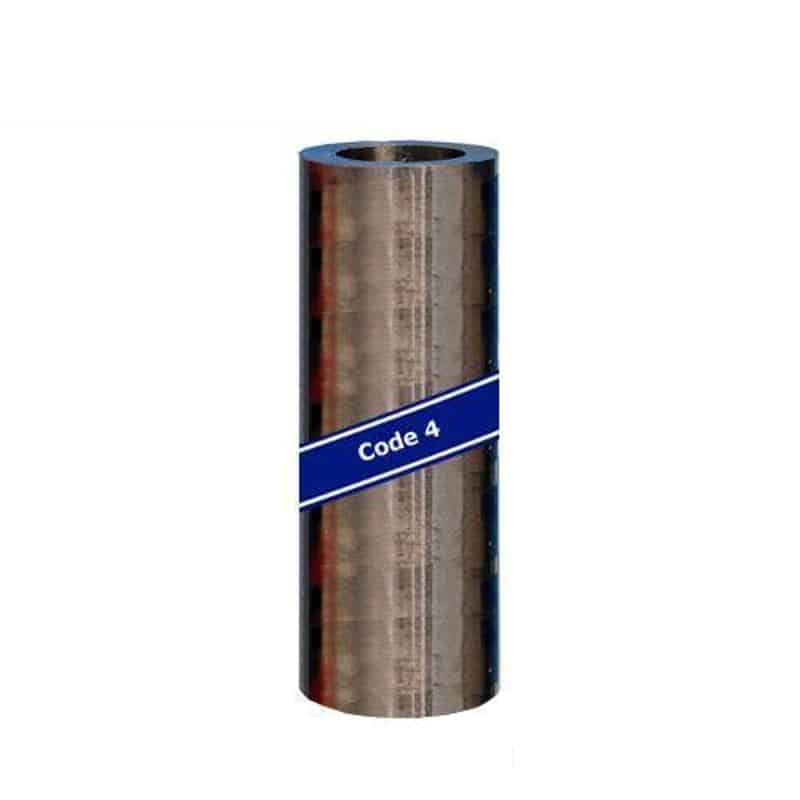
Lead Code 4 – Roofing Lead Flashing Roll – 300mm (12 inch) x 3m
Product code: 154056
- Product Weight: 18.5kg
- Thickness: 1.8mm
- Width: 300mm (12 inches)
- Length: 3m
- Genuine machine cast Lead manufactured by Midland Lead
- Long Lasting - Correctly installed lead will last over 100 years, far superior than lead free alternatives.
- Environmentally Friendly - Over 95% of lead is reclaimable and is fully recyclable
- CE mark EN14783 suitable for all roofing and cladding applications, including flat and pitched roofing, cladding, flashing, guttering and fine detail work
- BBA approved, BS EN 12588 compliant and comes with manufacturer (Midland Lead) 60 year guarantee
- This product is available in other sizes, find them in the links below in the description
Related Articles

30 Jul 2026
Softwood Timber Sizes Explained: 3×2, 4×2, CLS & What They’re ForIn the UK, ‘4×2 timber’ means nominal 4×2 inch (roughly 100×50mm) softwood, though planed/CLS 4×2 finishes at about 89×38mm. ‘3×2’ is nominal 75×50mm (CLS ~63×38mm). CLS is planed with rounded edges for stud walls; C16 and C24 are strength grades for structural joists and rafters.
Read More
30 Jul 2026
Insulating a Garden Room, Shed or Van: The Breathable + Foil ApproachTo insulate a garden room, shed or van, fit a breathable membrane on the cold outer side, add bulk or foil insulation in the frame, then seal a vapour control layer (foil membrane) on the warm inner side with taped joints. This 'breathable outside, sealed inside' order prevents interstitial condensation.
Read More
29 Jul 2026
Damp Proof Membrane (DPM) Guide: 1200g, Sheet vs Liquid & How to InstallA damp proof membrane (DPM) is a polythene sheet — commonly 1200 gauge (300 micron) — laid under or over a concrete floor slab to stop ground moisture rising into the building. It's lapped at joints, sealed with tape and linked to the wall DPC to form a continuous barrier.
Read More